
Hidden Damage After a Car Accident: What Your Vehicle May Be Hiding
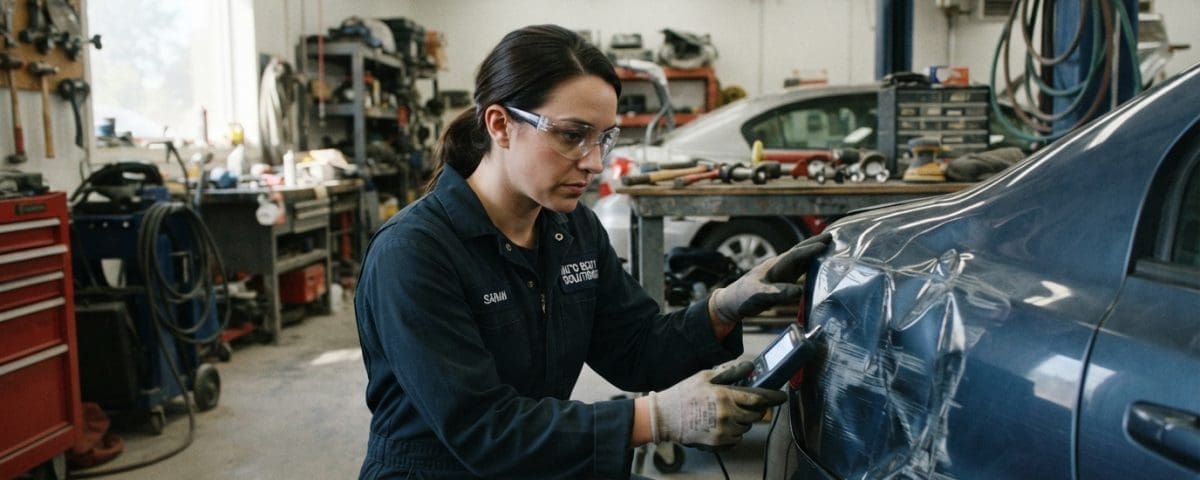
A damaged vehicle can look repairable from the outside while needing checks beneath the surface. After a crash, making dents disappear is only part of the job. Repairs must preserve safety and function, too.
The collision repair shop will inspect, plan, repair, test, and review the work. Hidden damage or parts availability can change the plan, so your first estimate may not show every step. Good repairs follow vehicle needs and manufacturer standards, not appearance alone.
Insurance, clear communication, and quality checks can help you understand what happens to your vehicle. You can expect decisions along the way, especially if new damage appears once technicians open an area.
Here is a practical walk-through of the checks and choices that carry a vehicle from estimate toward delivery.
Key Takeaways
- Visible damage may hide problems beneath panels.
- An initial estimate can change after disassembly.
- Ask how the shop checks safety systems and repair quality.
- Parts availability and added repairs can affect timing.
- Review the final work and paperwork before pickup.
What Is the Collision Repair Process From Estimate to Delivery?
A repair usually begins with an estimate, but the complete work plan may not be clear until damaged areas are opened up. The first estimate is a starting point, not always the final list of work. The repair process can change as technicians find more damage.
The general path moves from assessment and authorization to disassembly, repairs, refinishing, reassembly, testing, and delivery. Not every vehicle needs every operation. The collision repair process depends on the damage, the vehicle, and the repair plan.
How the work moves from an initial estimate to a repair plan
At first, the shop reviews visible damage and prepares an estimate. You and the insurer discuss coverage and approval before work moves ahead. Once the shop begins disassembly, technicians can inspect parts hidden behind damaged panels.
Those findings help the shop set a fuller plan and parts list. Technicians then repair or replace damaged components, prepare surfaces, and refinish affected areas. After reassembly, the shop checks the work and returns the vehicle when it is ready.
The work may pause when a new repair needs approval or a needed part has not arrived. That pause does not mean the vehicle has left the repair process. It means the next step depends on a decision or item that is still pending.
What a body shop repair process flow chart should show
A useful body shop repair process flow chart shows both the steps and their dependencies. For example, disassembly should come before the full repair plan and parts list can be finalized. The chart should show when approval, repairs, paint, and testing fit into the work.
A car collision repair process does not follow one fixed path for every vehicle. A small repair may need fewer operations than a damaged structure or affected safety system. The flow chart helps you see where work stands, while the shop confirms which steps your vehicle needs.
The first decisions rely on visible damage and checks for problems an outside inspection cannot reveal.
How Are Damage and Repair Costs Assessed?

A careful assessment starts by checking the impact area and looking beyond the panels that are easiest to see. Hidden damage matters because it can affect both cost and safety. A bumper that looks lightly damaged can conceal frame misalignment or suspension-component damage.
The shop checks the vehicle, records damage, and prepares an itemized estimate. A diagnostic scan may be needed on modern vehicles to find fault codes and affected safety systems. The first estimate may change if disassembly reveals more damage.
What the first inspection and diagnostic scan can reveal
During a visual inspection, technicians look at damaged panels and nearby components. They may take photos to document what they find. A scan can show electronic faults that are not visible on the outside.
The shop uses this damage assessment to describe the work it can identify at that point. It may list repairs, replacement parts, and diagnostic needs. The estimate gives you and the insurer a shared record of the proposed work.
How an estimate and insurance claim take shape
A supplement is an updated estimate requesting approval for additional damage or repair operations discovered after disassembly. It records added work that the first estimate could not include. The shop sends it to the insurer when new findings call for a change.
Before authorizing work, check whether the estimate explains these points:
- Are all damaged areas documented?
- Are diagnostic needs noted?
- Are proposed repairs and replacements itemized?
- Have you asked the insurer about coverage or your deductible?
Is it worth filing a collision claim? Compare the estimate with your deductible, and check your policy and insurer before deciding. No single rule fits every claim because coverage, costs, and claim effects can differ.
Authorization and a clearer plan are needed before teardown and parts ordering can proceed.
What Happens After Insurance Approval?
A teardown can reveal damage that was not visible when the initial estimate was written. Opening the damaged area lets technicians check what sits behind panels and trim. New findings may require a supplement before added repairs can proceed.
The shop documents additional damage and requests approval when the repair plan needs to change. The schedule and parts list may shift while the insurer reviews added work. Parts should be checked for proper fit and function when they arrive.
Why technicians disassemble damaged areas
Technicians remove damaged panels and trim to inspect underlying components. A bumper cover may hide damage to supports or nearby parts. Removing parts also helps the shop see which items can be repaired and which need replacement.
The shop records new findings and sends a supplement when needed. The full parts order follows once the plan is clear enough. Ordering too early can leave the shop with parts that do not match the actual repair needs.
How parts choices and supplements affect the repair plan
Parts choices can affect cost, fit, and timing. OEM parts come from the vehicle’s original manufacturer and can offer a close fit and finish, but lead times may be longer. Aftermarket parts can reduce costs in some applications, while recycled parts can be budget-friendly in specific cases.
| Part type | Potential advantage | Tradeoff |
|---|---|---|
| OEM | Close fit and finish | May take longer to arrive |
| Aftermarket | Can reduce cost in some applications | Fit and suitability need checking |
| Recycled | Can be budget-friendly in specific cases | Availability and suitability depend on the repair |
When parts arrive, ask how the shop confirms each item is ready to use:
- Correct vehicle application
- Undamaged condition
- Proper fit
- Working function
Once the repair plan and parts are settled, the next priority is restoring the vehicle’s structure and body panels to specification.
How Are Frame and Body Repairs Made Safe?

A vehicle can appear straight while its structural measurements show otherwise. Precise checks help technicians find misalignment and guide structural work. Measuring systems can help bring dimensions back to manufacturer specifications.
Frame or unibody correction addresses the vehicle’s structure; panel repair addresses outer body parts. Technicians use equipment suited to the vehicle and follow manufacturer standards for its materials. Steel and aluminum need material-appropriate procedures.
How frame and unibody measurements guide structural work
Computerized three-dimensional measuring systems compare vehicle dimensions with the correct specifications. The readings can identify structural misalignment and help guide corrections. Technicians use those measurements to track the work rather than relying on how the vehicle looks.
Frame and unibody repairs call for care because structural parts support the vehicle in a crash. The shop follows procedures that fit the make, model, and materials. Restoring the pre-accident condition means checking dimensions as well as visible shape.
Aluminum repairs may need specific tools and technician training. Using tools meant for another material can affect the repair. The shop should use the equipment and methods suited to the damaged component.
When body panels are repaired or replaced
Technicians may repair a panel when the damage allows a sound repair. They replace it when the damage or loss of integrity makes replacement the right choice. The plan depends on the part, the extent of damage, and the applicable repair procedure.
What is the hardest repair to do on a car? There is no universal hardest job. Major structural corrections and material-specific repairs can demand specialized equipment, training, and precise procedures.
Once the structure and panels are ready, surface preparation and refinishing restore the exterior finish.
How Do Painting and Refinishing Restore the Finish?
A repaired panel needs a properly prepared surface before new paint is applied. Each stage supports the finish that follows. Color matching and controlled booth conditions help create a consistent result.
The painting process can include surface preparation, primer, color matching, base coat, and clear coat. Booth controls help limit airborne dirt during paint application and curing. No color match can be promised in every circumstance.
| Stage | Work involved | Purpose |
|---|---|---|
| Surface preparation | Clean and prepare repaired areas | Support adhesion |
| Primer | Apply and cure primer | Prepare the surface for color |
| Color and base coat | Match and apply the color | Blend the repaired area with the vehicle finish |
| Clear coat | Apply and cure the protective finish | Complete the refinishing |
After the finish is checked, the removed parts and vehicle systems can be put back together.
What Happens During Reassembly and Final Testing?
A fresh finish is not the final checkpoint if sensors or other systems were disturbed during repairs. Reassembly includes function checks, not just putting parts back in place. Some affected sensors, cameras, and radar systems may need calibration.
The collision repair shop reinstalls removed components and checks related systems. Diagnostic post-scans and a test drive can help show whether vehicle systems work as intended. The final inspection checks fit, finish, function, and listed repair items.
How reassembly and ADAS calibration restore vehicle functions
Technicians reinstall trim, lights, panels, and other removed components. They check that parts fit and connect as intended. If a collision or repair affected ADAS, the vehicle’s advanced driver assistance system, calibration may be required.
Calibration aligns sensors, cameras, or radar systems so they can perform their intended functions. The need depends on the vehicle and the work performed. Ask whether the repair plan called for calibration and whether the shop completed it.
What final scans, inspections and road tests check
A diagnostic post-scan checks for faults after repairs. A road test can help reveal concerns that may not appear while the vehicle sits in the shop. Technicians also inspect repaired areas and the items listed in the work plan.
Before pickup, use this checklist with the shop:
- Look over repaired areas.
- Check lights and other affected features.
- Ask whether required calibrations and scans were completed.
- Review the repair paperwork with the shop.
After those checks, your remaining questions may be how long the work takes and what to look for in a local shop.
How Long Can Repairs Take, and How Do You Choose a Shop?
Two vehicles with similar-looking dents can require different repair plans and schedules. Damage extent is only one factor. Ask for a vehicle-specific schedule and updates because no fixed turnaround fits every repair.
Concealed damage, parts availability, insurer approvals, and required calibrations can all affect repair time. A repair timeline can change when teardown uncovers damage or ordered parts do not fit. The shop can explain what is known and what might still cause a delay.
What can change the time needed for repairs
Work may take longer if technicians find damage behind a panel or need approval for added repairs. Parts may also arrive late or fail a fit check. Calibration and testing add steps when affected systems need them.
Ask the shop what must happen before it can give a firmer schedule. Find out how it will share updates if the repair plan changes. A clear update can help you plan around the vehicle’s time in the shop.
How to choose a collision repair shop near you
Search for “collision repair near me” to find local options, then compare how each shop handles your vehicle’s needs. Ask about experience with its materials and systems, such as aluminum parts or ADAS. A nearby repair shop should also explain its repair procedures and quality checks.
Discuss how the shop shares schedule changes and what its final inspection covers. Ask how it handles new damage and parts that do not fit. Those answers can help you judge whether the collision repair shop communicates clearly and checks its work.
Use these questions when contacting a local shop. Miracle Body and Paint Collision Center has two San Antonio locations for your next step.
Conclusion
A good repair plan keeps safety and appearance in view through the final inspection. Your vehicle should be checked for function as well as finish, with repair items reviewed before pickup.
Miracle Body and Paint Collision Center serves San Antonio at two locations:
North West San Antonio, Leon Valley: (210) 680-1987, 6217 Grissom Rd., San Antonio, TX 78238.
North East San Antonio: (210) 858-3630, 4650 Walzem Rd., San Antonio, TX 78218.
Contact and hire Miracle Body and Paint Collision Center to fix the collision damage on your vehicle.